To be able to have two different VATs on customers in BRP they need to be on different subscriptions/product since you can’t have more than one VAT on a product.
Here is a step by step guide on what you need to do in BRP.
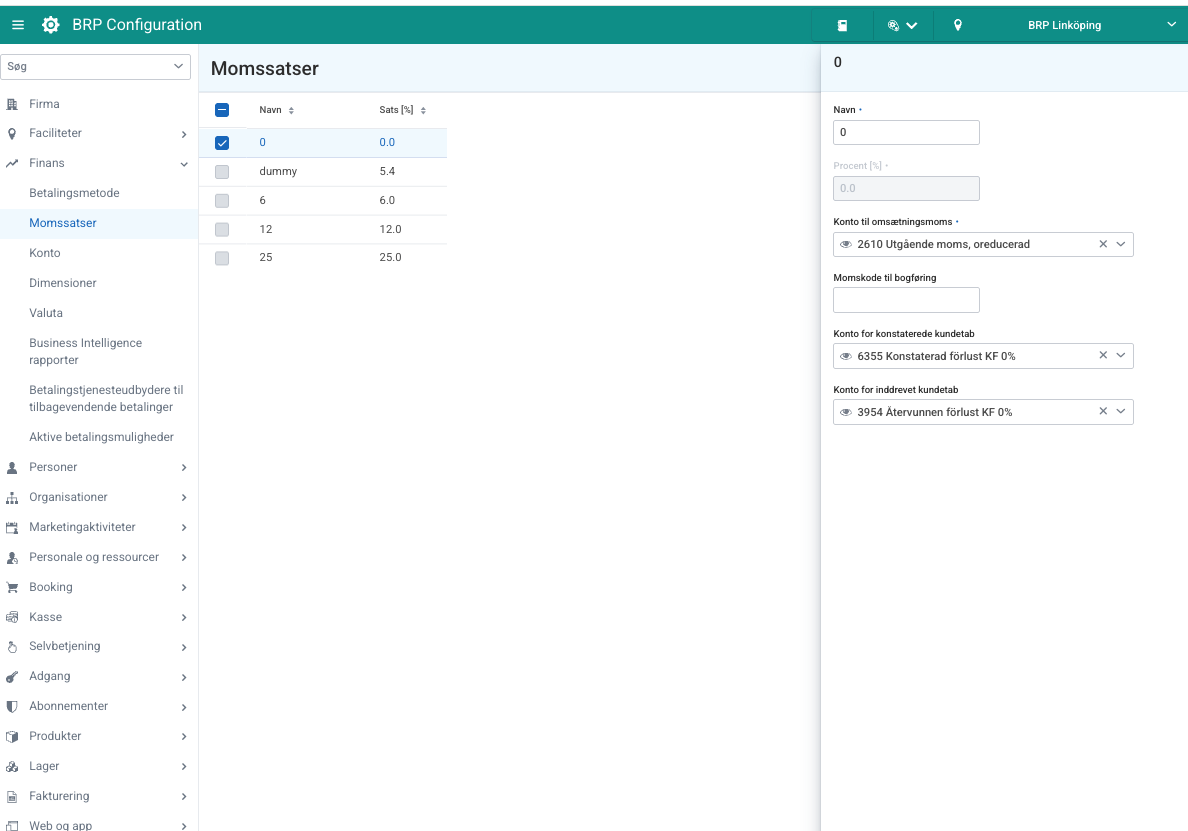
1. Set up the VAT group and connect it to the correct account
Go into Configuration (green module) and go to Finans -> Momssatser and add a new VAT-group if needed by pressing +. Connect the correct accounts for the VAT group. See picture below on where to find it and an example of how it can be set up:
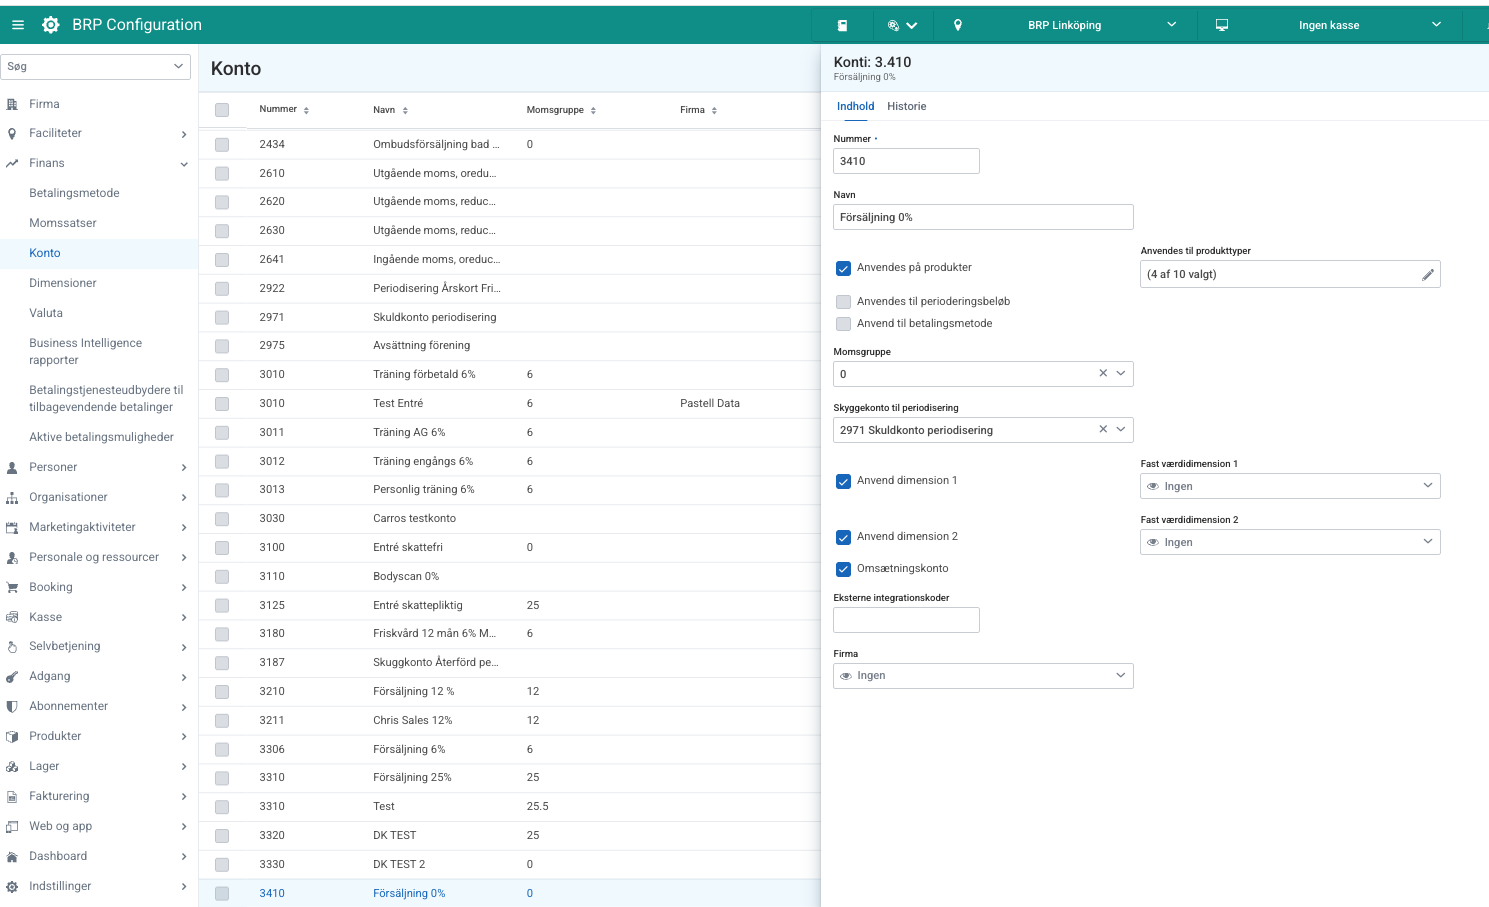
2. Connect the VAT group to the correct account
We are still in the configuration module and we should now go into Finans -> konto. Add a new account if needed by pressing the +. Select the number for the account, make it availbe on the product types you want by pressing ”Anvendes på produkter” and att the types in the list. Select the correct VAT group on the account. See picture below for example:
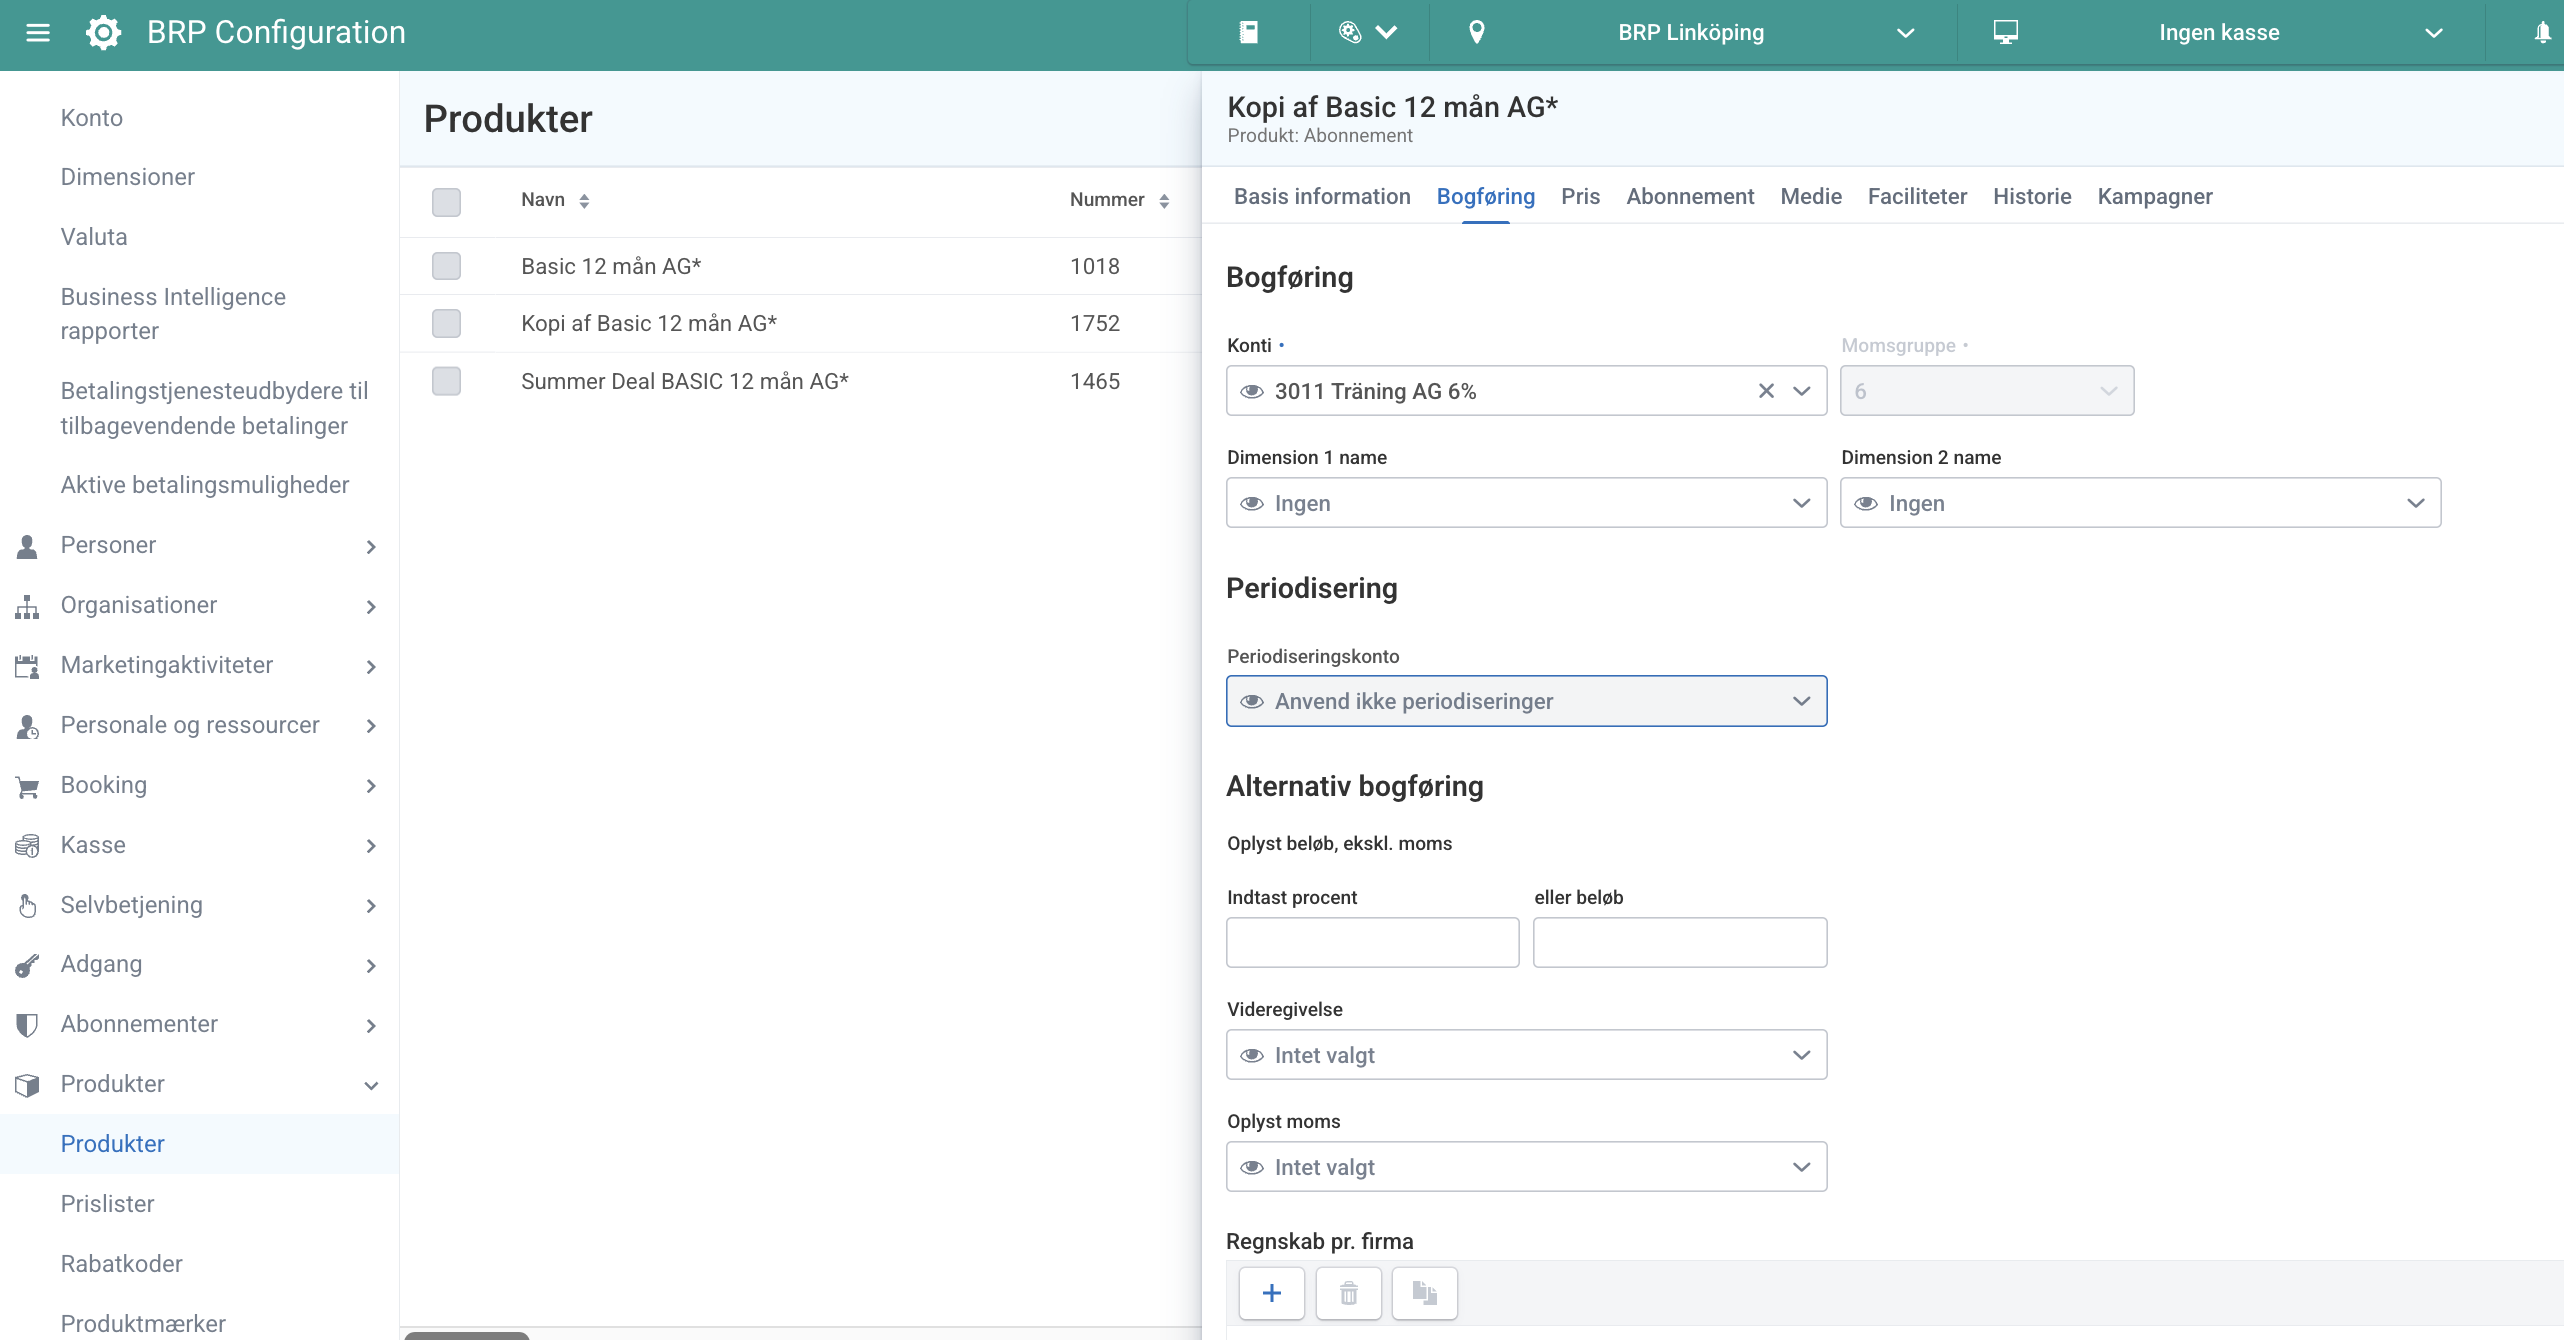
3. Create the product and connect the correct account
We stay in configuration and go to Produkter -> Produkter. Create a new product by pressing the + or select to copy an already existing product by searching for it marking it in the list and pressing ”Kopier Produkt”. Set up the product as you want it and think to set the correct account with the correct VAT group that we created in the previous steps. If you copy a product make sure to go over all the information within the product to see that it is as you want. Note that you always need a standard price on the product that is higher than the price list prices on the product. Link to documentation on Price lists.
See picture below for example:
4. Select customer to change susbscription on the first time
Now we move over to Back Office (blue module) and go into Abonnementer -> Abonnemanter. Press ”Avanceret valg” - > ”Bruger” and select the date range you are looking to change. In this example we will look into selecting all active members under 30 to change their subscription. Select the age span 0 – 29 under ”Person” tab and select ” Aktiv” = ja under the ”medlem” tab then press ”Nytt valg”. See pictures below for filter selection:

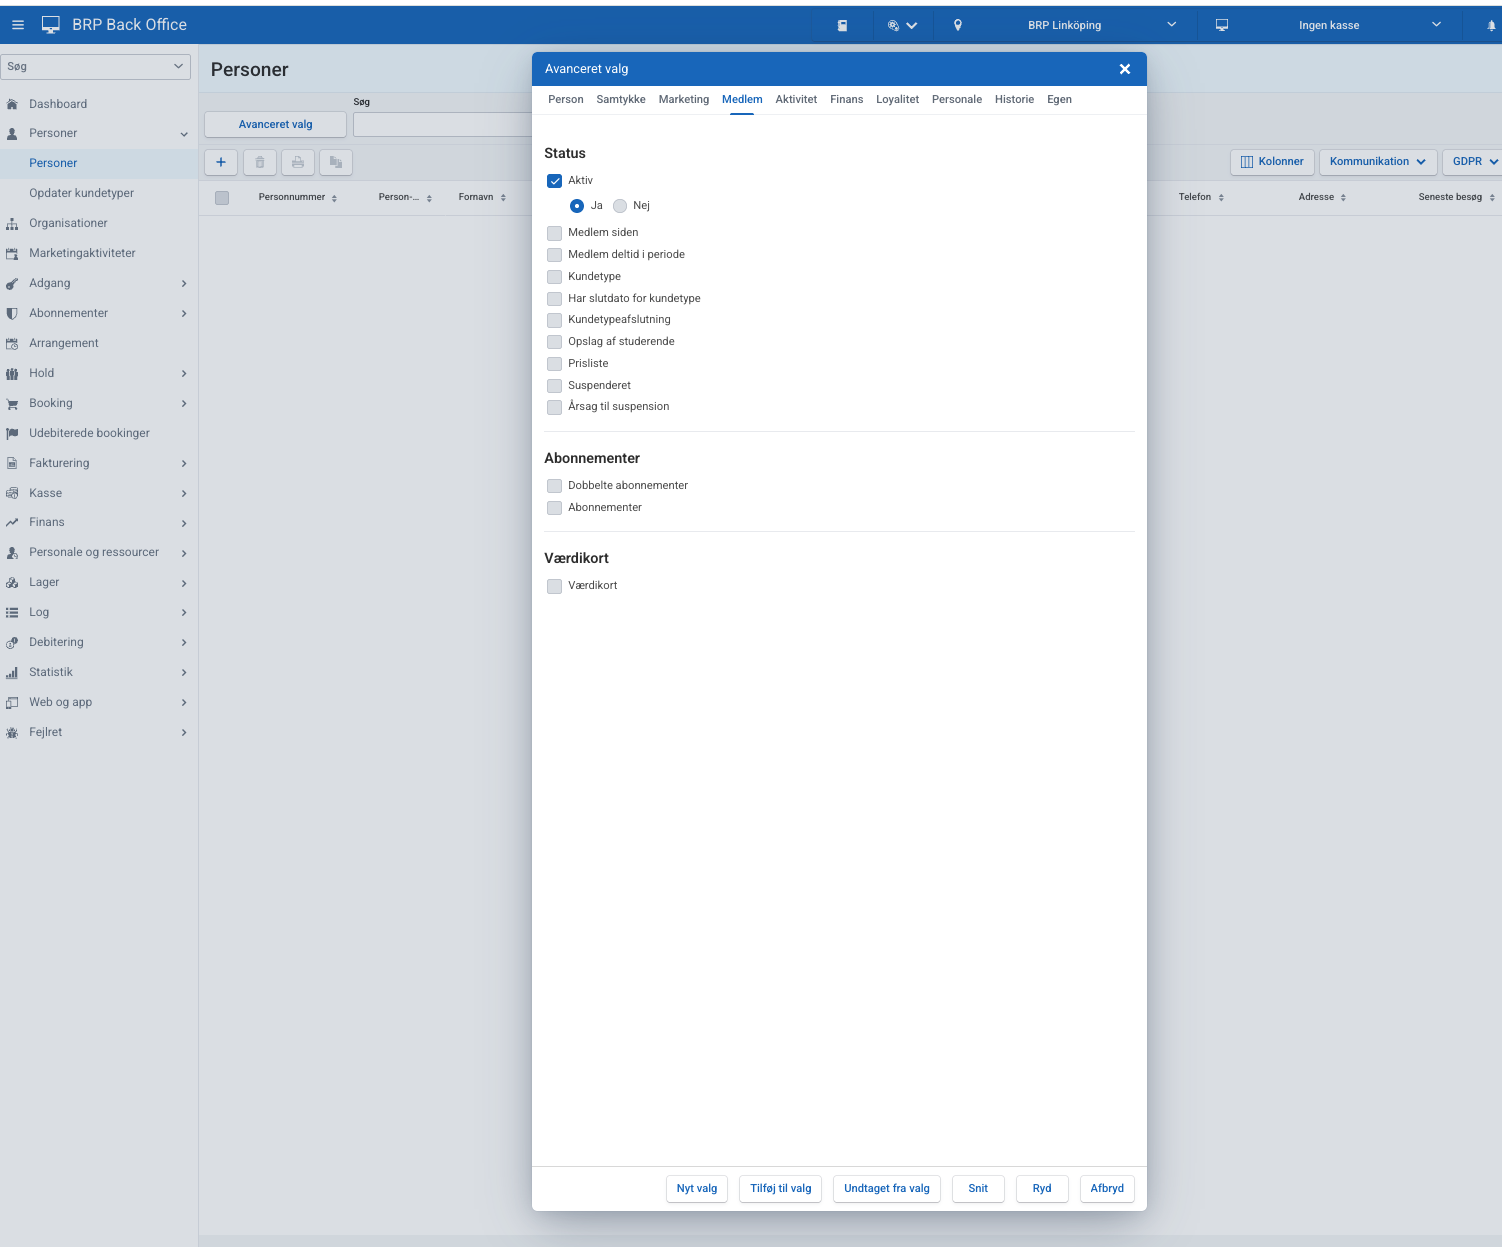
If you have multiple different subscriptions that needs to be changed you can sort the list by type of subscription by pressing the ”Abonnement” in the column.
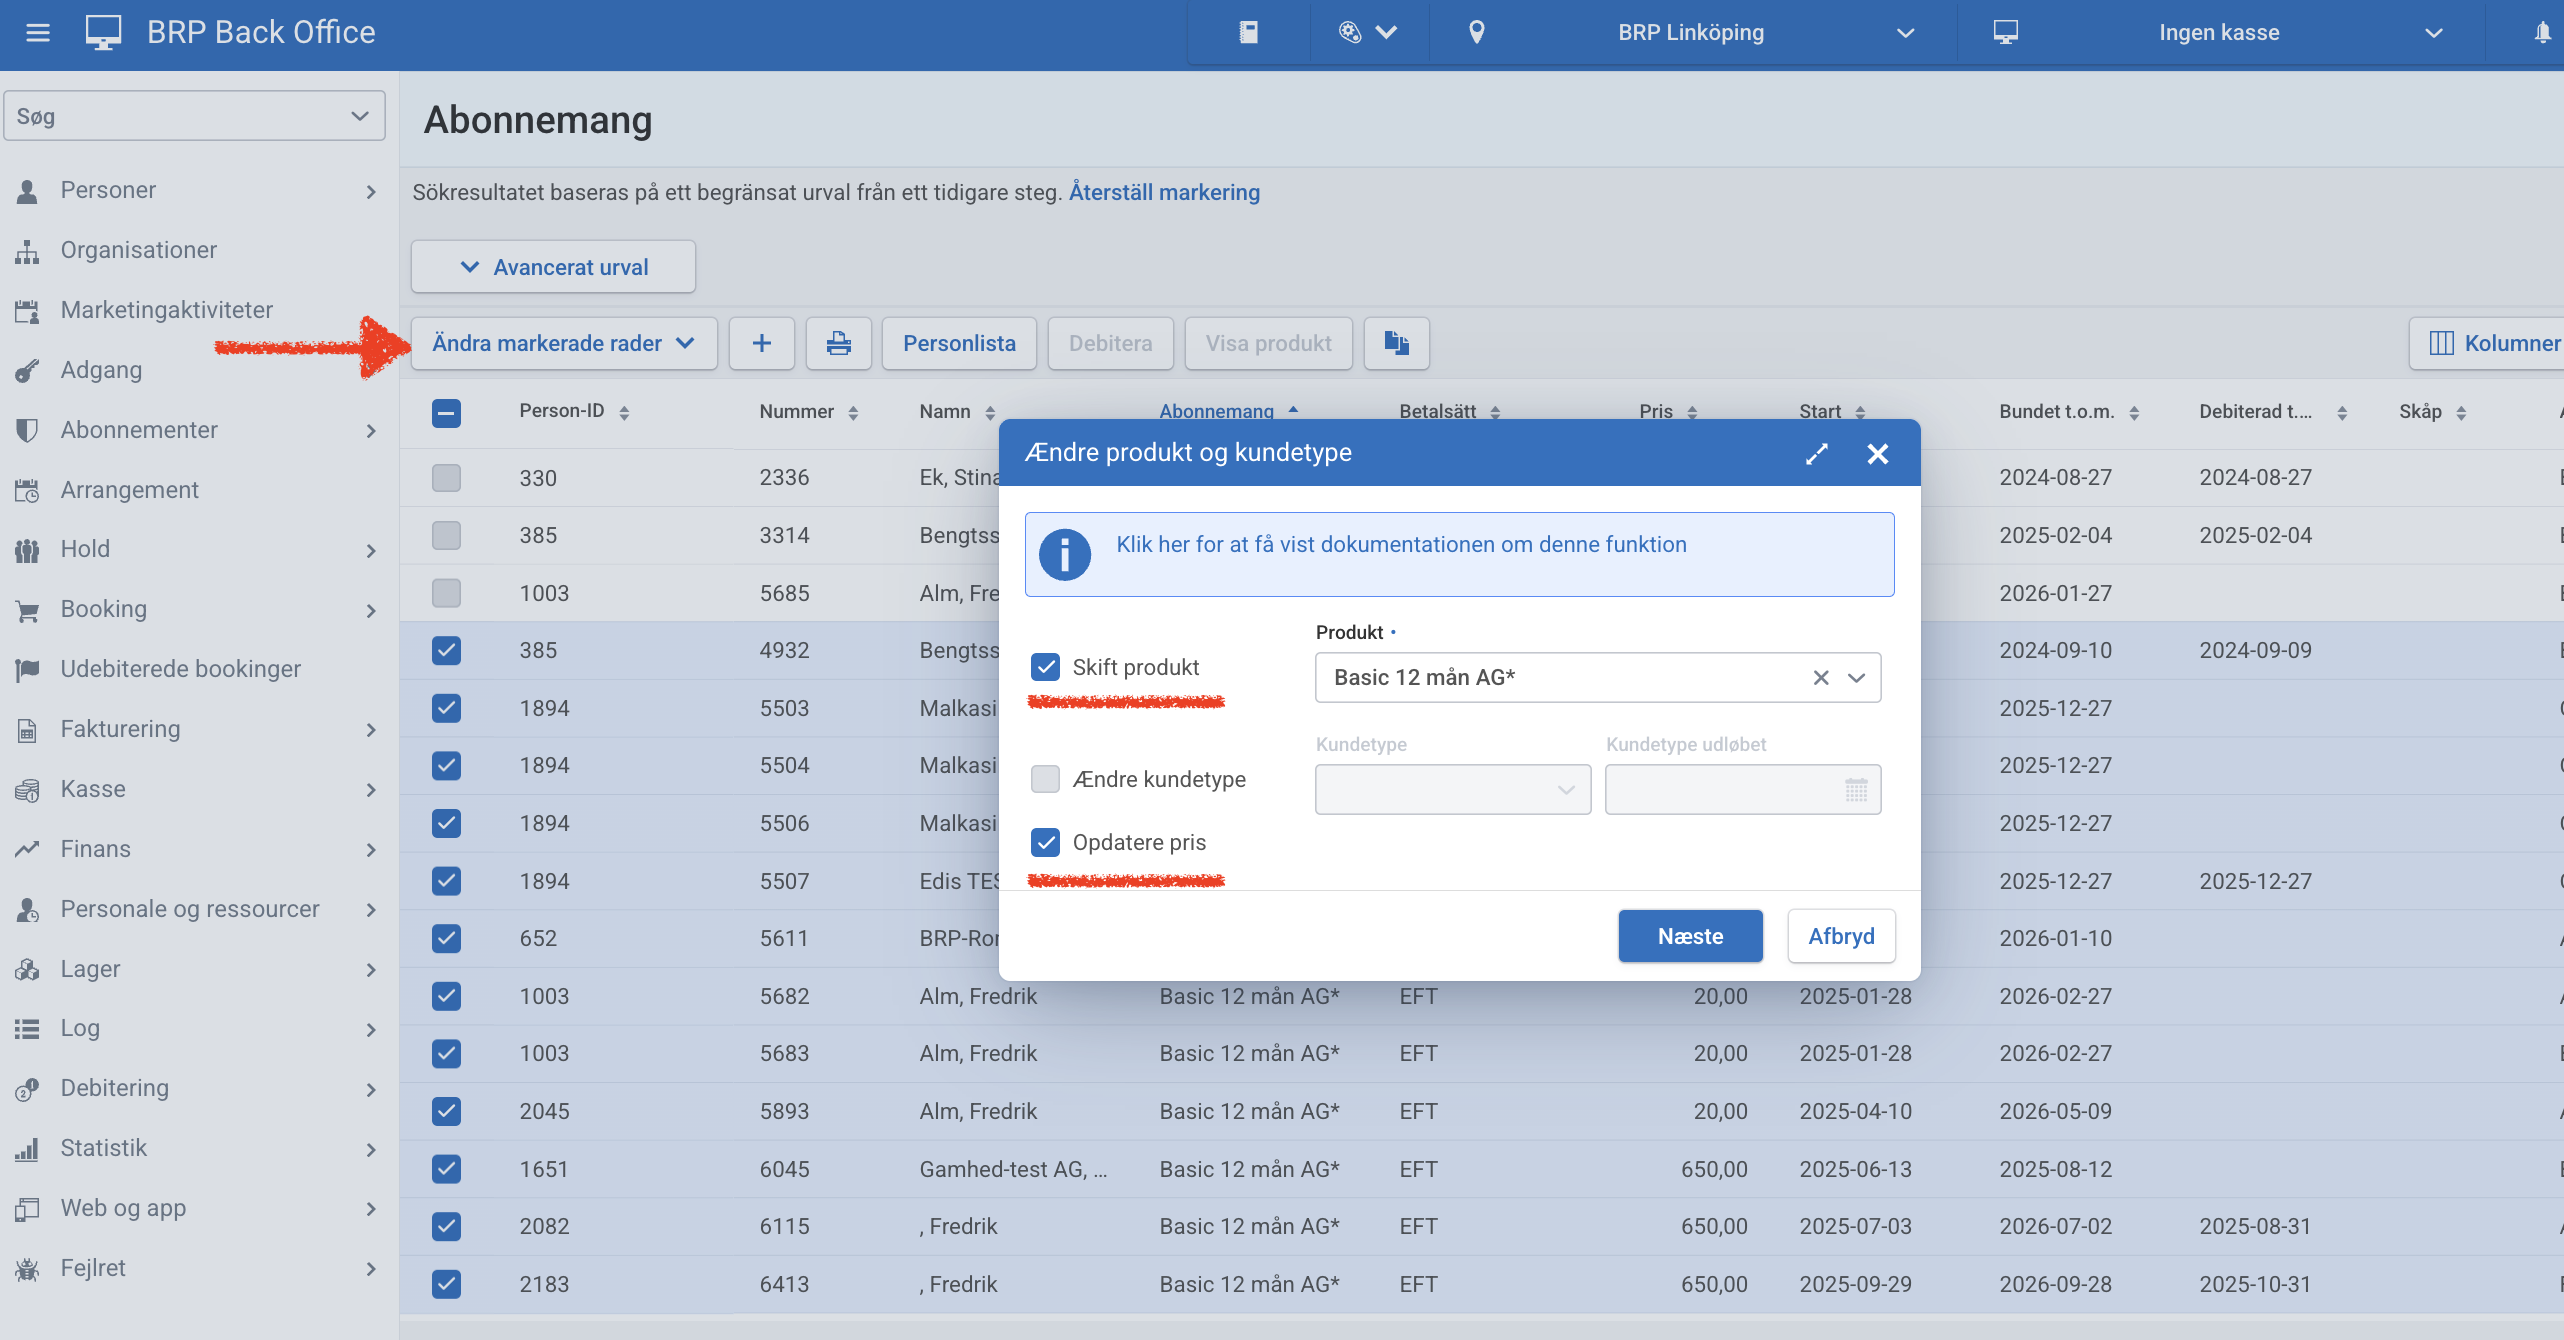
5. Change subscription product in bulk
From the previous selection we can now mark the subscriptions in the list we which to change. You can mark multiple by marking one and then holding SHIFT when marking someone lower in the list to mark them and everyone inbetween. After marking the subscriptions press ”Ändra markerade rader” and select ”Skift produkt och kundetype”. Select to change to the product you wich by marking the checkbox ”Skift produkt” and selecting the new subscription in the drop down menu. If you wich to update the price on the subscriptions you are changing to the new price on the product you are changing to mark the checkbox ”Oppdetere pris”.
Repeat step 4 & 5 until you have changed all the subscriptions you wish to change.
6. Control the changes you made
After you have completed the step above you need to verify the changes you have just done. Search for the subscriptions again as described in step 4 and check the prices are correct. If you are using customer types that you have changed, check that those are correct as well.
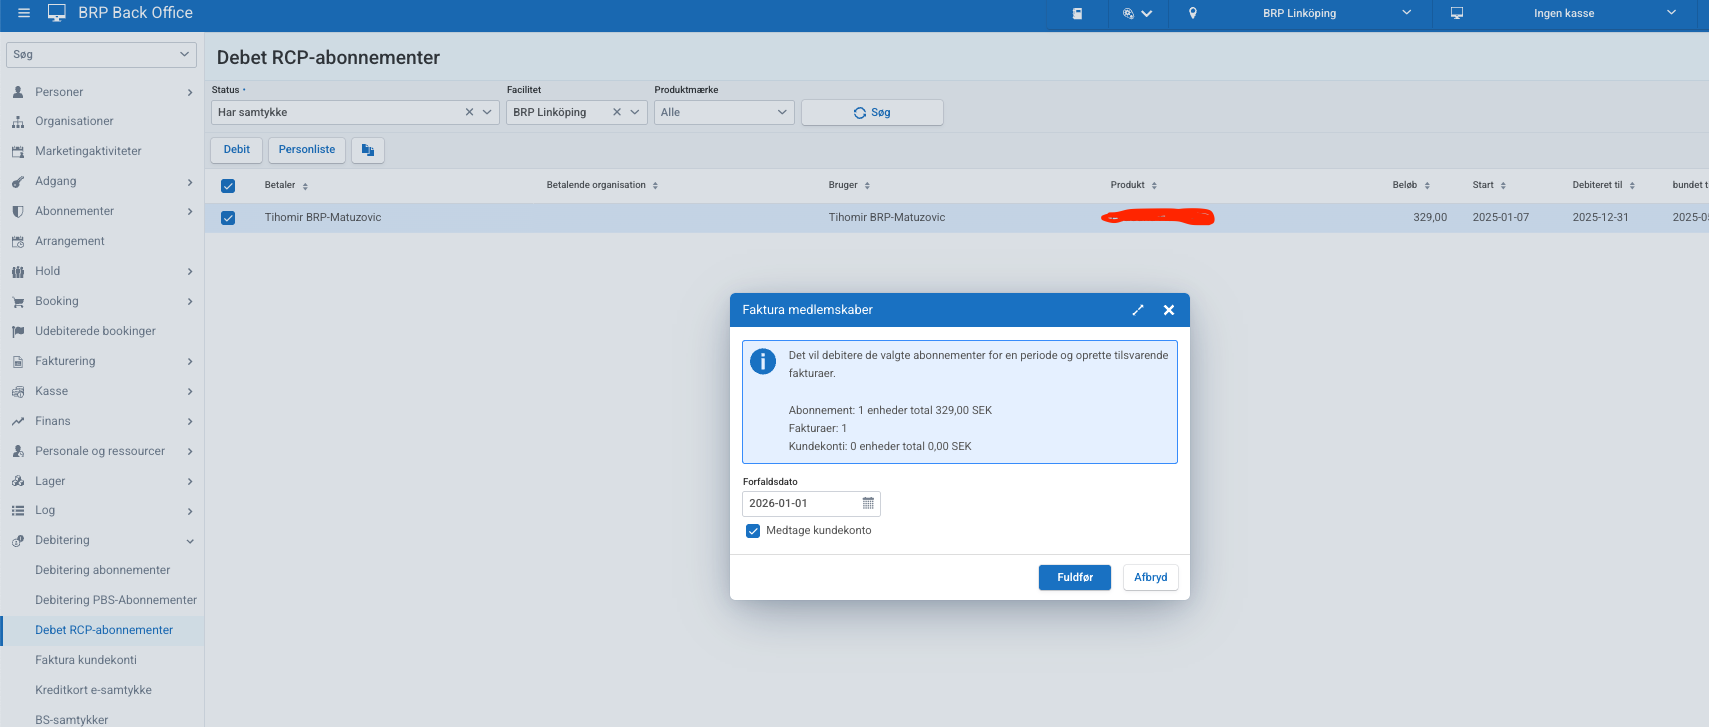
7. Debit subscriptions
If you want to create the invoices and the debit of the subscriptions in advance to ensure the upcoming debit is correct you can que this work after you’ve completed the stages above. To start de debiting process go into Debitering -> Debet RCP-abonnementer search for the subscriptions for the facility you want to debit. Mark the subscriptions and press debit. BRP will suggest the Due date on the debit make sure this is the correct date for the debit and press Complete. See Picture below for example: